
What is Lutradur, and How Do I Use It?
National Quilters Circle EditorsWhat is Lutradur?
Lutradur is a spun-bond polyester stabilizer and it comes in two weights, 70 grams, and 100 grams.
The 70-gram Lutradur melts easier and at a lower heat, whereas the 100-gram Lutradur is more difficult to melt but better to print on.
Painting Lutradur
 This medium is wonderful for added dimension in your mixed media projects.
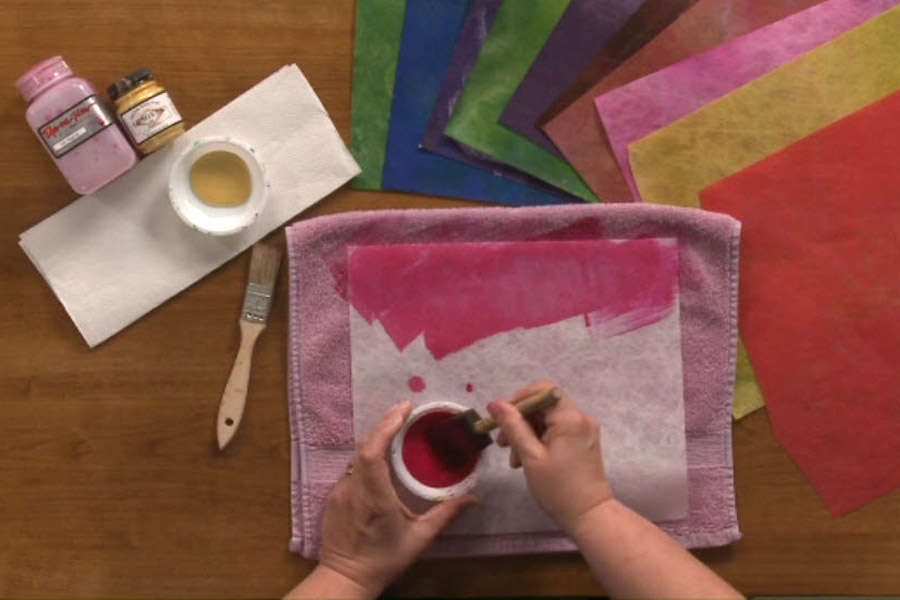
One of the best ways to use Lutradur is to first paint it. You can use a variety of paints; Dynaflow and Luminere by Jacquard are the paints Heather uses in her segment.
Because Lutradur is web-like, the paint will go right through it so it is important to put a towel under the Lutradur while painting to absorb any excess paint. If you are really adventurous, you can use fabric under your Lutradur and do a little fabric painting at the same time.
Adding Glitz
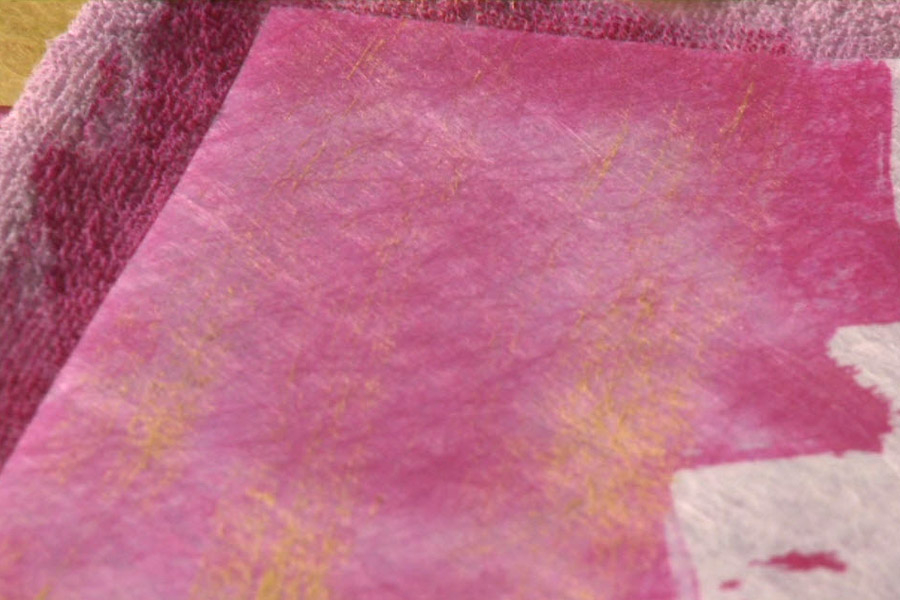 If you would like to see a little added glitz, try some metallic paint.
Dip your brush into the paint, dab off any excess, and then run or drag it through already-painted areas just for a little punch of WOW!
Set aside to dry. Dry time will depend on how much paint is used. When completely dry, it will be ready for use.
Photo Printing
Lutradur is also a great medium for printing photos on. If you plan to do this, however, you will need to first prepare it with one of the following preparation tools:
- – Digital Ground Medium,
- – Ink Aid, or
- – Bubble Jet Set
These mediums need to be painted onto Lutradur, first painting in one direction with a paintbrush and then paint in the opposite direction. You can paint left to right, right to left, top to bottom, bottom to top; just make sure it is covered if you plan to use it in your printer.
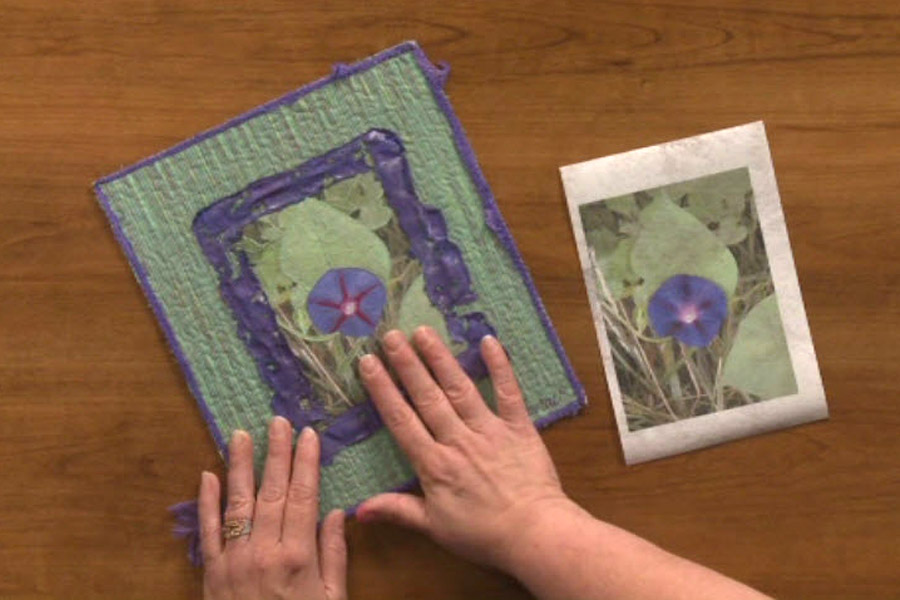 Once it is completely dry, send it through your printer for a beautiful quality print with extra texture! Lutradur that is sent through the printer is a perfect medium for thread art, and better yet you won’t need stabilizer because Lutradur is a stabilizer itself.
Mixed Media Art Quilts
And still there is more… it’s like Christmas morning! Heather also demonstrated ways to melt and score Lutradur as a great design tool for mixed media art quilts. It is important to remember that 70-gram sheets melt much quicker than the 100-grams.
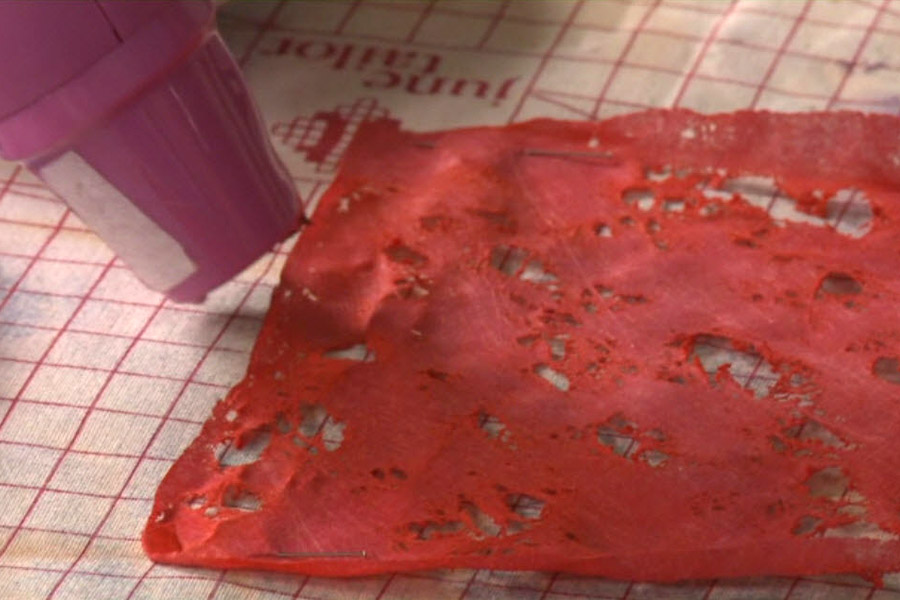 In the video, Heather walks you through how to properly melt each weight. Be sure to work in a well-ventilated area.
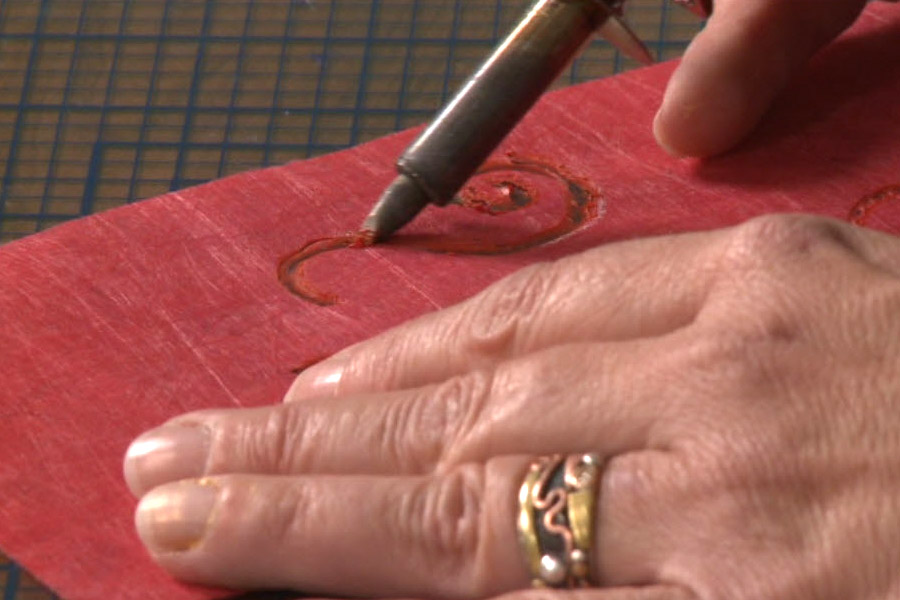 She also shows ways to make the edges more interesting as well as creating designs in Lutradur by scoring it.
When scoring, be sure to use a heat-resistant surface such as glass, tile, or a cookie sheet. One of the most important tools to use when melting or scoring the 100 gram sheets is patience. It’s thicker and will take longer to melt.
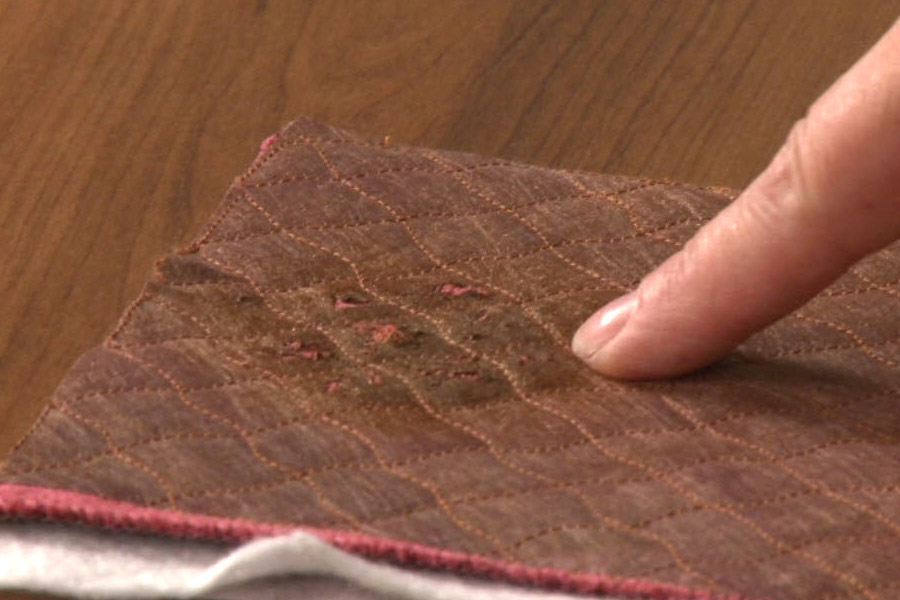 Hard to believe, but that is not all! You can also pre-quilt painted Lutradur before melting it.
You will first need to layer your sandwich with backing, batting, and top material. Next apply dried painted Lutradur, pin it securely, and begin quilting! Any metallic paint you may have used will make melting a bit more difficult, so just be patient. The hot air gun you use will melt in between the quilting lines giving an aged look with depth and texture.
I am so stoked to try this technique; I’m heading out to pick up my supplies. I’d love if you would do the same and post some of the results you get with your new skill!
So, how many ways are you planning on using Lutradur? Happy quilting my friends!
Get in touch! Leave a comment or email editor@nationalquilterscircle.com.
Lutradur is one of the hottest new products in today's mixed media quilt world. It is a great, great product. You can paint it, melt it, and print on it. It's a spunbond polyester. Here we have it in two different weights, one is a 70 gram and the other is 100 gram.
The 100 gram is heavier. The 70 weight will melt easier, but the 100 gram is the best to print on. You can see it here painted in a larger array of wonderful colors. I'm gonna show you how to paint it real quick. The products that I'm using are Dye-Na-Flow by Jacquard and Lumiere also by Jacquard.
So I'm just going to use a foam brush and simply paint the surface. Because it's a web basically, the paint is going to go through. So it's nice to make sure you have something underneath to absorb the excess paint. You can see that quite a bit of the paint gets absorbed through the surface and down into the towel. Now, when I'm painting in my studio at home I just put fabric underneath there so I can paint fabric same time.
To really make the Lutradur a really fun product to use we want to add some glitz to it. So this is a metallic paint and I'm going to get the bulk of it off my brush and then just run little bits of the metallic through it. Now I have to do is wait for it to dry and I'm ready to use it. You can also print on Lutradur. You can find it sometimes packaged by C&T at your local quilt store already cut in eight and a half by 11 sheets so that it's easy to feed through your printer.
But first you need to prepare it for printing so that the ink will be permanent and color fast. What I usually use is digital ground medium. It can be found at an art supply store. You can also use a product called ink aid or bubble jet set. You're going to paint it on with a paintbrush and allow it to dry.
And then paint a second coat moving the paintbrush in the opposite direction and allow that to dry. When it's completely dry you just feed it right through your copier like you would a piece of paper. So this photograph here was printed right through the printer. It gives you a beautiful quality, but because the product has that spun webby look, you also have that additional texture in the piece. The beauty of doing photographs on Lutradur is that if you want to thread paint you do not have to put any stabilizer on the back because that's what Lutradur is, a stabilizer.
So it's quite stiff. So you can use it underneath your machine as you thread paint and not have to put that stabilizer on it. So this piece is done from this photograph. It was thread painted before the quilt was put together, and then more quilting was added afterwards. This piece was also a photograph.
This is a piece of an old motor. And it was heavily thread painted in some areas and then very lightly quilted in other areas. Learning how to print with Lutradur will save you lots of steps when you're doing thread painting. It's a great way to create thread painted quilts. Melting and scoring Lutradur is a great thing to add to your art quilts and your traditional quilts.
Here we have two different types of the Lutradur, the heavier weight 100 gram and the lighter weight 70 gram, and we're going to melt them using an everyday heat gun. The best way to control the Lutradur is to pin it in place before you start melting. And you'll see here, as we start melting the two of these that the lighter weight melts much faster than the heavier weight does. What we're going to try to get is an effect called lacing. And that's what we see right here.
This piece here has a lot less melting on it and it's the heavier weight. So pinning it to the ironing surface will protect the table that you're working on also. So I'm going to add direct heat with the heat gun, make sure that you're working in a well ventilated area before you start this. How close I keep it to the surface determines how quickly it's going to burn through. So for the lighter weight, I'm going to hold the gun a little farther away.
And then for the heavier weight, I'm gonna put it a little bit closer. Sometimes it takes a while for the tool to heat up, but once it heats up, it really starts to move the product. So here we go. Now, if we want to have a more natural looking edge, if we hit the edge with a heat gun, we can watch it start to distort and move in. So that didn't take much time at all, but the heavier weight one is going to take a little while longer.
You also need to be prepared that different colors of paints react to the heat in different ways. So like here with the violet, it is turned the violet to more red-violet, very dark. Whereas the red was untouched at all. This quilt, little tiny quilt, was made using two pieces of the Lutradur, both melted. After I quilted the quilt, I simply laid them down on top of it, stitch them in place, and then added this wonderful bead.
Now we can also score the Lutradur, meaning that we are going to cut it with a hot tool. You can use a regular soldering iron for this. We're using a creative craft tool by Willow Hollow. This tool gets really, really hot, so you need to be very careful when you're using it. Kind of hold it like it's a pencil.
It will cut directly through the Lutradur. It sticks a little bit to the surface. Make sure that your surface is heat proof. I'm using glass. You can also use an old cookie sheet or a tile.
You can mark on your Lutradur first. Mark a particular design that you want to follow, and then follow that design. You generally have to go over the design several times to make a wide enough line or opening so that then you can see the design when you lay it on top of another fabric. You'll see that other fabric behind it. It's also really nice to give your Lutradur a very funky edge.
You can just cut that edge with your tool... and pull it off. I like to then soften the edge with the side of the tool. So here we have this nice swirl. We'll remove that bit of Lutradur that's in there.
And if it's stuck we'll just add some more heat and get it out of there. So there we go. When we put that on top of a quilt we'll be able to see the other fabric underneath. Now, when you're working on the heavier duty it takes a lot longer for the tool to melt through because the product is so much thicker. So just be prepared to go over the area several times to do your cutout.
And there you go. Now, if you want to pre-quilt your project before you burn it, there's a couple of steps you want to go through first. So this quilt here, it's a layering process. I started with the backing fabric set batting on top of it. Then I set out squares of various fabrics, they were in burgundy and gold.
And then I top those with layers of the painted Lutradur. And I have both weights, the a hundred weight and the 70 weight. I pinned everything in place and then I quilted each section with a different quilting design. And then after it was quilted and I had stitched the edge then I burned it. Because there's the two different weights, some areas burned a whole lot, so that you can see through a lot, and other areas just burned a little bit.
I really liked the circles. So you can really see that circular design in the fabric that's underneath it. So here I have a sample that is a backing fabric, and a batting, and a main fabric, and the Lutradur that's painted on top. It's a heavyweight Lutradur and it has a lot of metallic paint on it. The metallic paint makes it a little harder to burn through.
So you have to put a lot of heat. It's going to burn through in the open areas in between the quilting lines. So you can see how long this is taking, but now we get this wonderful aged look and the fabric that's underneath is starting to peak through. And that's how we achieved this fabulous quilt. Burning, and melting, and scoring, and painting, and printing on Lutradur is really a lot of fun, and it can add some great, great texture to your quilts.


I am from Canada. Do you have any address where I can find colorés Lutradur? Could be an address in NY city too, my sister lives there…thank you
Thank you for the explanations and tips about Lutradur. I purchased a package years ago and you have given me wonderful ideas on how to be creative with it, not only for quilts, but for papercrafts as well.
interesting, but I cannot view the video