I’ve seen lots of discussion lately about how to transfer photos or text to fabric. However, there is some crucial information to know before you attempt this, and specialty products on the market for this artistic approach to patchwork. Most of the projects that quilters are creating with the photo transfer or text transfer process are “one-of-kind” creations. That being said, the longevity of those photo transfers can be a concern, so let’s walk through the steps to achieve the best outcomes.
1. Preparing Your Own Fabric for the Photo Transfer Process
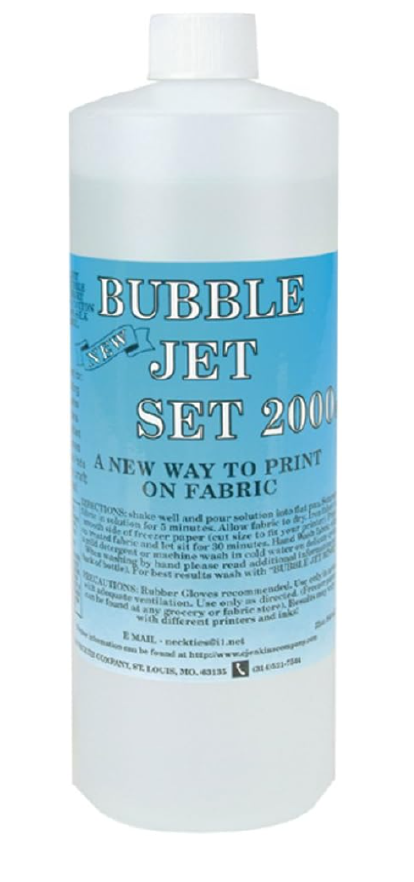
Pre-treat your fabric with a product like Bubble Jet Set 2000 to make the fibers accept ink. Soak the fabric in the product according to the manufacturer’s directions. Line dry.
Cut wax backed freezer paper larger than a sheet of paper for your printer. Iron the fabric to the wax side of the freezer paper.
Trim fabric/freezer paper to the 8-1/2” x 11” to fit the printer. Set the printer to “mat” paper and “best” quality photo. Then print your photo to the fabric side. After printing remove the freezer paper. Your custom fabric is ready for use in your patchwork project.
2. Purchasing PFD (prepared for dye) Fabric
PFD fabric by the yard can be purchased at your local quilt shop or purchased through online sources. This helps eliminate the pre-treatment process and speeds up the timeline.
You simply cut the fabric and freezer paper sheets a bit larger than the paper used in your printer. Iron the waxy side of the freezer paper to your PFD fabric. Then, trim the piece to the 8-1/2” x 11” to be easily placed in your printer.
Print the photo to the fabric side of your prepared sheets. Again, set the printer to “mat” paper and “best” quality photo. After printing remove the freezer paper layer. Your customer photo is ready for use in your quilt.
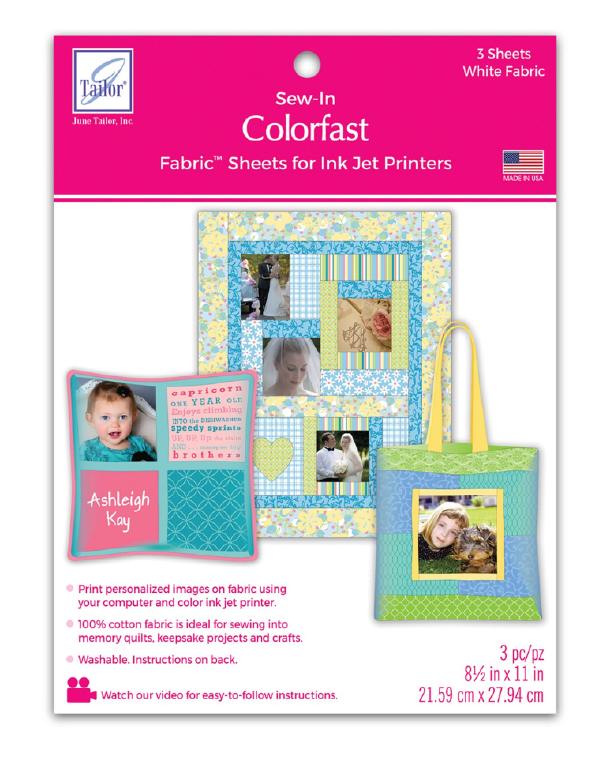
3. Prepackaged Printable Sheets for Photo Transfer
There are a variety of companies that offer pre-packaged fabric sheets for photo printing. This eliminates the need for preparation and makes the process very streamlined. Some companies will offer a variety of fabric types like silk, sateen and simple quilters cotton. Do a bit of research when selecting a fabric type to match the quilts used to the type of fabric you choose. The photo here is one example of a company that provides quality photo fabric sheets for printing.
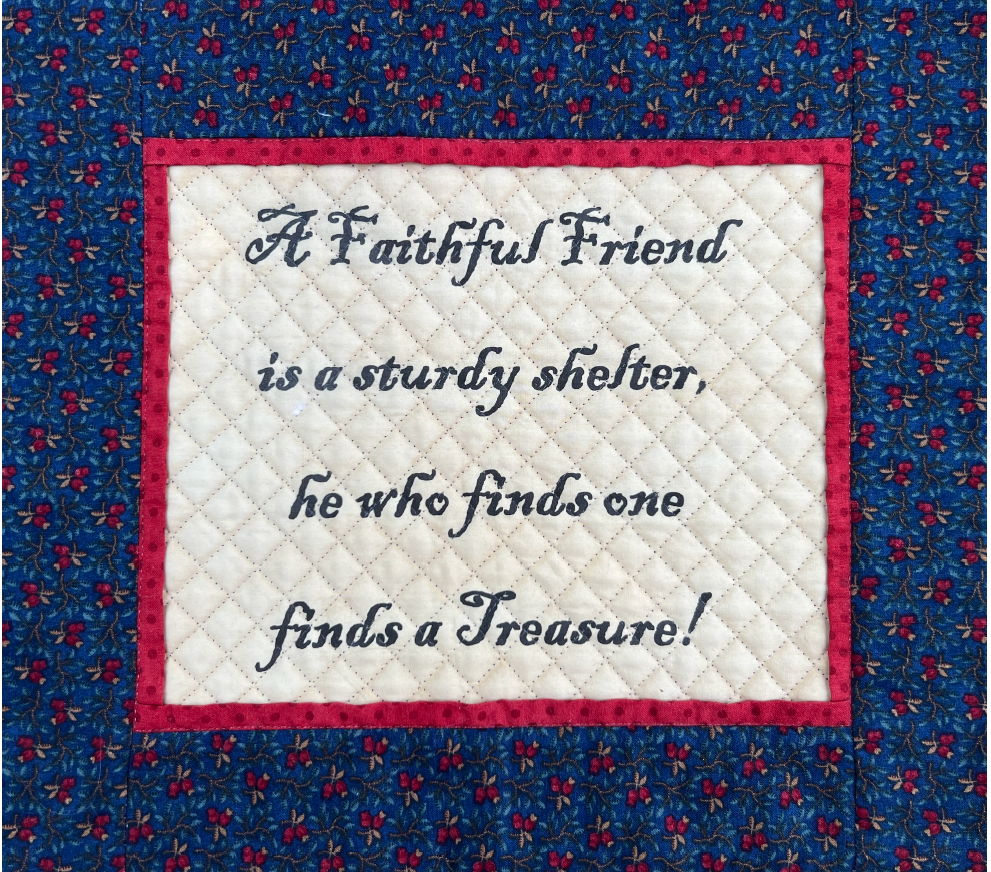
I have used this process for transfer of a fun text style to fabric. Here is an example of a wall hanging I created years ago. Anything you can design on the computer screen can become a professional-looking printed piece of fabric – ready for your patchwork project. This could also be used to print custom quilt labels and could even include a picture if you prefer.
Now, Go Be Creative!
Happy Quilting,
Colleen Tauke
Managing Editor NQC

Once you soak and dry the fabric and iron the freezer paper on, how long can you wait to print on it or do you have to do it right away? I have 6 quilts to make.
Most photo transfer sheets I've found require an inkjet printer. Are there any for a laser printer? Can you use these homemade sheets in a laser printer? Susan
Can u make this beginner friendly