If you have a pile of clothing and T-shirts that have special meaning but don’t really know what to do with them, a T-shirt quilt may be the perfect solution. Not only will you get to revisit some old favorites as you work, but the finished quilt will have both sentimental and practical value.
Tips Before You Begin
Sewing and quilting with knit fabric is a different experience from using high quality quilter’s cottons. Because the fabric of a T-shirt is designed to be flexible and stretchy, pieces cut from the shirt will curl and flex out of shape as well. The T-shirts you’ve chosen for your project are likely well-loved memory pieces – and may not be in perfect condition. Laundering, wearing, and handling ages fabric, so some parts of your shirt may show extra signs of wear. The easiest way to prepare a knit fabric for quilting is to use a fusible, non-woven interfacing to prevent stretching and curling.
Related video: Types of Interfacing Fabric and Interfacing Sewing (links to our sister site, National Sewing Circle)

Choosing a lightweight fusible interfacing to back your T-shirt pieces can help smooth out any uneven or worn patches and prevent your blocks from spreading out of shape. Depending on the size of your T-shirts, you’ll be able to stabilize four to eight shirts per yard of interfacing.
Heavy weight T-shirts, or those made from a thick or dense knit fabric that is less flexible and more sturdy, may not need stabilizer, but most lightweight to medium knits will benefit from adding a non-woven fusible interfacing as directed. Using a stabilizer helps to equalize your fabric weights by adding some additional heft to your T-shirts, allowing them to more closely mimic the weight and hand of a good quality quilter’s cotton. If you are unsure of how your knit will perform, cut a sleeve from the garment in question and apply fusible interfacing. Compare the stabilized piece with the rest of the garment to see which version you prefer to work with.
Design Decisions for Your T-Shirt Quilt
A T-shirt quilt is a personal, custom project based on items you already own – each finished quilt will be uniquely yours – and each will have its own look and flavor. Take some time to plan out a design for your quilt. Think about layout and how you want your shirts to look. Do you prefer a uniform look with square blocks that are all the same size or do you want to fussy cut each T-shirt to perfectly highlight the design portion, and then put your quilt together like a puzzle? It may be helpful to fold the T-shirts and lay them out on the ground to get an idea of which type of layout you prefer. Snap a photo of your layout so you have something to refer to as you assemble your quilt.
If you have a diverse group of shirts, you can piece smaller shirts together to make larger blocks or combine with cotton fabric to create blocks that are large enough to work into the rest of your quilt. Sashing and borders can be added as desired – using the interfacing makes it easy to combine your T-shirts with traditional quilt cottons.
Related class: Making a T-Shirt QuiltMaking Your T-Shirt Quilt
Here is a list of supplies and materials you will want to have on hand before you begin making your T-shirt quilt:
- T-shirts in all shapes and sizes
- Lightweight, nonwoven fusible interfacing
- Scissors
- Rotary cutter, ruler, and mat
- Fabric for sashing and borders as desired
- Your favorite quilt batting
- Basic sewing supplies
Select shirts based on their appearance, sentimental value, and how well they work together. Shirts can be thin or worn, but any large tears or holes may render your shirt unusable for your quilt. Wash the shirts and dry them completely to remove stains or odors.

Cut the Shirts
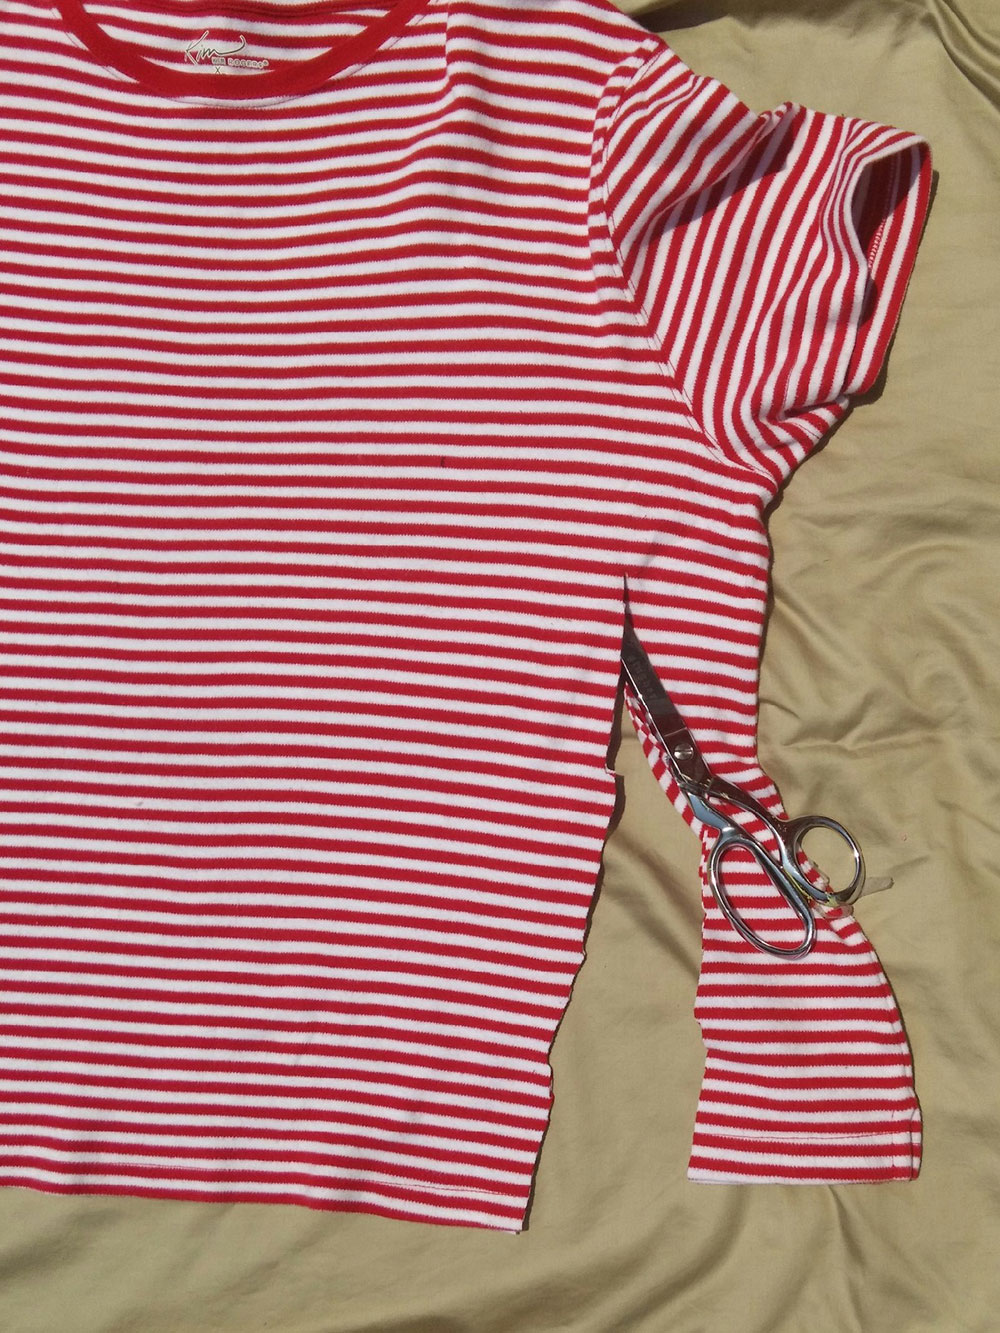
Use scissors to remove the sleeves from each shirt. Separate the front from the back by cutting along the shoulder seams. Carefully cut each side from the hem to the armhole to completely separate the front from the back. If both sides have design elements you want to use, you can incorporate them into your quilt or reserve the plain, unadorned portions for another project.
Choose Your Block Size
Choose a block size that relates to the size of your shirt pieces – if you are working with adult men’s T-shirts, you can make your blocks up to 16” square. Child or teen sized shirts will naturally yield smaller blocks; unless your shirts are very small, plan on cutting out 10”-12” squares.
Prepare the Interfacing
For each T-shirt, cut a piece of fusible interfacing that is larger than your chosen block size. Place the T-shirt piece image side down on your ironing board and top with the interfacing, with the adhesive side down. Center the interfacing behind the image or position it as desired. Follow the manufacturer’s directions to fuse the interfacing to the back of the T-shirt. Pressing from the back protects the images on the shirt; cover the shirt with a pressing cloth if you decide to press from the front. Repeat for each shirt.
Trim Your Blocks
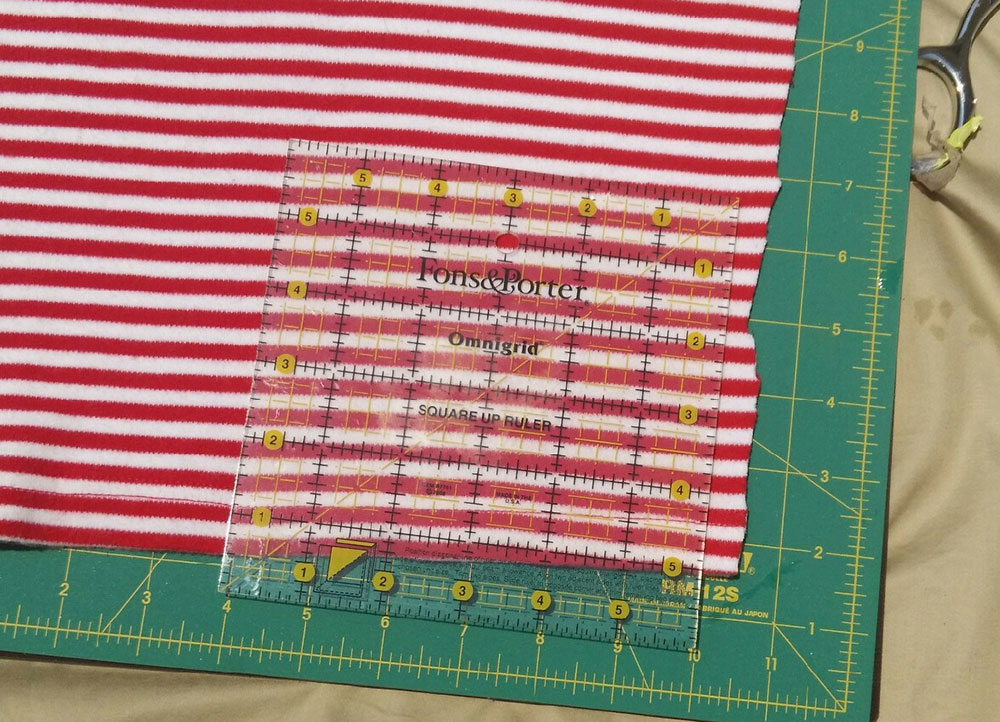
Using your rotary cutter, ruler, and mat, trim each shirt piece to your chosen square size.
Piecing the Blocks
Lay your quilt out on the floor to make sure you are happy with the arrangement, then stitch the blocks together. Sew your stabilized shirts together into rows, stitching each piece into place with the right sides together and pressing each row after sewing. Sashing can be added as you piece or you can simply sew the T-shirts together.
Stitch your completed rows together to complete your quilt front. Sew the strips of T-shirt together with the right sides facing each other and then press the finished quilt front.
Related video: Strip Piecing Quilt Techniques
Finish the Quilt
Choose a backing and batting for your fabric and quilt as desired. Hand quilting may be more difficult than usual if you have used thick T-shirts; otherwise you can quilt by hand or machine using your favorite pattern or stencil.
Caring for Your Quilt
Since the shirts you’ve used for your quilt have likely been laundered many times, you won’t need to do anything special to care for your quilt. You can wash it in the washing machine and hang to dry or tumble dry on low.
It’s never been easier to make something special out of your memorable shirts and clothing! Whether you already have a collection or need to raid your family’s closet, you can make a delightful and meaningful piece that you’ll treasure for years to come.
If you’re interested in learning more about making t-shirt quilts, check out National Quilters Circle’s brand new class, Making a T-Shirt Quilt with Kelly Hanson.
Happy quilting!
Have something to add? Leave a comment or email editor@nationalquilterscircle.com.

Your article is very inspiring with high-quality content. We are sure that you will find additional useful information on our website. Come on, visit us at <a href="https://junjunan.co.id/">Jasa Konveksi Bandung</a> and we can collaborate with each other. Warm Regard.
Thank you very helpful
I just lost my husband of over 51 years. This will be a perfect way to help me deal with being alone and have a great useful homemade quilt to keep him with me when I need to feel his presence the most .
I do not know how to sew. Would somebody be interested in creating a quilt with the t-shirts that I have saved. I love having the memories saved. Thank you.
Should I cut the squares 1-2 inch bigger than the 12 inch square ?
Great tips, thanks for your time and help.
Thank you for your clear instructions. You make the process a lot less daunting and intimidating than it seems to be. Granted, I haven't done anything like this before. Getting started is the hardest!
Thank you for a wonderful explanation on how to make a t-shirt quilt. That is going to be a next project.
Should I fuse interfacing to the cotton borders also?
Trying to make my first tshirt quilt